It sounds like you have a good strategy, now you just have to keep playing it until you are able to pull off the Major Victory. Also keep in mind each time you play it, the scenario will be different because of variants. Some variants are hard, some not so hard.. None are easy though for this one.I was able to achieve a minor victory, and withdraw the bulk of the command back to Cemetery Hill. I deployed two batteries on the left flank, along with Amsberg's brigade. I then deployed Krzyzanowski's brigade to the line of fences behind the crest which left Ames and Von Gilsa's brigade along with the artillery on the crest to face the Confederates. The remaining part of the corps I left on Cemetery Hill.
I am wondering if I could have achieved a major victory by keeping Krzyzanowski's brigade back, withdraw Amsberg's brigade after thirty minutes, and trying to extricate Barlow's division regiment by regiment. Anyone have thoughts on this?
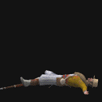
Position of Von Gilsa, Ames, and Artillery in Bullet Is Not Yet Molded Scenario
-
Little Powell
- Reactions:
- Posts: 4884
- Joined: Thu Sep 18, 2008 10:25 am
Re: Position of Von Gilsa, Ames, and Artillery in Bullet Is Not Yet Molded Scenario
-
Little Powell
- Reactions:
- Posts: 4884
- Joined: Thu Sep 18, 2008 10:25 am
Re: Position of Von Gilsa, Ames, and Artillery in Bullet Is Not Yet Molded Scenario
kaplan71 - I will replay this scenario and type up an AAR. I should be able to get it posted by tonight. This has helped other players in the past (see the thread on the McLaws scenario).
-
Little Powell
- Reactions:
- Posts: 4884
- Joined: Thu Sep 18, 2008 10:25 am
Re: Position of Von Gilsa, Ames, and Artillery in Bullet Is Not Yet Molded Scenario
Ok, just played it and got a 4,700 Major Victory. It's important to use all of the forces available to you except for the two brigades on Cemetery Hill.
Here's the setup on my right:
Here's the setup on my right:
- Attachments
-
- ames.jpg (50.79 KiB) Viewed 279 times
Last edited by Little Powell on Fri Oct 29, 2010 4:12 pm, edited 1 time in total.
-
Little Powell
- Reactions:
- Posts: 4884
- Joined: Thu Sep 18, 2008 10:25 am
Re: Position of Von Gilsa, Ames, and Artillery in Bullet Is Not Yet Molded Scenario
Here's my left. Notice how I brought up Amsberg to support the left, as well as two artillery batteries.
- Attachments
-
- amsberg.jpg (60.67 KiB) Viewed 279 times
-
Little Powell
- Reactions:
- Posts: 4884
- Joined: Thu Sep 18, 2008 10:25 am
Re: Position of Von Gilsa, Ames, and Artillery in Bullet Is Not Yet Molded Scenario
I brought up Kryzonowski to act as my reserve. As regiments start to break, I use his regiments to fill in the gaps.
- Attachments
-
- krz.jpg (63.2 KiB) Viewed 279 times
Last edited by Little Powell on Fri Oct 29, 2010 6:34 am, edited 1 time in total.
-
Little Powell
- Reactions:
- Posts: 4884
- Joined: Thu Sep 18, 2008 10:25 am
Re: Position of Von Gilsa, Ames, and Artillery in Bullet Is Not Yet Molded Scenario
With this setup, you should be able to hold the rebs for the whole scenario. But if the Rebs are especially aggressive, retreat back and find other ground. Keep in mind at the 30 minute mark, the Cemetery Hill OBJ will activate. Make sure Shurz is there so he can get the points. They start out at 25 per minute, and go up to 100! So those points are crucial for pulling off the victory.
Hope this helps!
Hope this helps!
- Attachments
-
- win.jpg (63.98 KiB) Viewed 279 times
Last edited by Little Powell on Fri Oct 29, 2010 4:13 pm, edited 1 time in total.
Re: Position of Von Gilsa, Ames, and Artillery in Bullet Is Not Yet Molded Scenario
Hi there --
I looked at the strategies posted by Little Powell and others, thanks to all by the way, and finally achieved a major victory. Here is what worked for me:
1. Positioned the two brigades of Barlow at the top of the crest.
2. Moved Wilkinson's artillery that was at the top of the crest to a position where it could sweep the field left of the crest.
3. Moved Wheelers artillery, and that which is on Cemetery Hill to the right of the knoll.
4. Moved Amsberg's brigade along with another artillery unit to the field left of the knoll.
5. Moved Orlando's brigade to support the artillery to the right of the knoll.
6. Moved Krzyanowski's brigade right of Barlow's brigades.
7. Moved Coster's brigade, along with Shurz to Cemetery Hill.
The above deployments caused the enemy assault to be funneled up the crest. While this was going on, Amsberg's brigade along with the two artillery units swung around the right flank of the enemy and forced him to divert brigades to counter that threat. The artillery on the right flank inflicted heavy casualties on the enemy forces coming up to attack, and when an attempt by him was made to take the guns, Orlando's brigade forced him back.
The only downside that I encountered was the grevious loss of three of Krzyanowki's regiments being captured during one of the assaults that made it to the crest of the knoll. However, that was the high-water mark. After that the enemy attacks sputtered out, and the position remained in my possession.
What do you think?
-
Little Powell
- Reactions:
- Posts: 4884
- Joined: Thu Sep 18, 2008 10:25 am
Re: Position of Von Gilsa, Ames, and Artillery in Bullet Is Not Yet Molded Scenario
Nice job! With the right troop placements, it's hard to lose this scenario.Hi there --
I looked at the strategies posted by Little Powell and others, thanks to all by the way, and finally achieved a major victory. Here is what worked for me:
1. Positioned the two brigades of Barlow at the top of the crest.
2. Moved Wilkinson's artillery that was at the top of the crest to a position where it could sweep the field left of the crest.
3. Moved Wheelers artillery, and that which is on Cemetery Hill to the right of the knoll.
4. Moved Amsberg's brigade along with another artillery unit to the field left of the knoll.
5. Moved Orlando's brigade to support the artillery to the right of the knoll.
6. Moved Krzyanowski's brigade right of Barlow's brigades.
7. Moved Coster's brigade, along with Shurz to Cemetery Hill.
The above deployments caused the enemy assault to be funneled up the crest. While this was going on, Amsberg's brigade along with the two artillery units swung around the right flank of the enemy and forced him to divert brigades to counter that threat. The artillery on the right flank inflicted heavy casualties on the enemy forces coming up to attack, and when an attempt by him was made to take the guns, Orlando's brigade forced him back.
The only downside that I encountered was the grevious loss of three of Krzyanowki's regiments being captured during one of the assaults that made it to the crest of the knoll. However, that was the high-water mark. After that the enemy attacks sputtered out, and the position remained in my possession.
What do you think?